A recipe says to let the dough rise for an hour. After an hour, the kitchen is cool and the dough still looks much as it did when you put it down. Should you shape it anyway? Start by finding the condition the recipe expects at that stage. The time tells you when to look. The dough tells you what has happened so far.
This guide is for home bakers following a recipe for ordinary yeasted wheat bread. It distinguishes the first rise from the final rise, explains how a container can make growth easier to see, and shows how to use a gentle touch without treating it as a universal test. Use the directions for your particular dough when they give a different cue.
Read the rise instruction all the way through
Look for a phrase that describes the desired change. The recipe may ask for a dough that has roughly doubled, a shaped loaf that looks noticeably puffy, or a pan loaf that reaches a particular height. Those phrases describe different observations. A pan height makes sense only with the intended pan and amount of dough. A volume change is easier to judge when you can see the starting level.
The King Arthur Baking bread guide distinguishes the first rise, often called bulk fermentation, from the final rise of the shaped dough. In the first rise, the dough is still together as one mass. After shaping, it expands in the form that will go into the oven. A sign that is useful for one stage may not be useful for the other. The volume of a mass in a bowl and the height of a loaf in a pan are not the same measurement.
Consider two batches of the same recipe. One starts with cooler ingredients and rests in a cool kitchen. The other sits in a more temperate spot and looks ready sooner. Before deciding either is wrong, compare the conditions and the cue in the recipe. A schedule based on a previous bake is a starting point. If the recipe gives a range, start checking near the earlier end and record what you see.
Give yourself a baseline to compare against
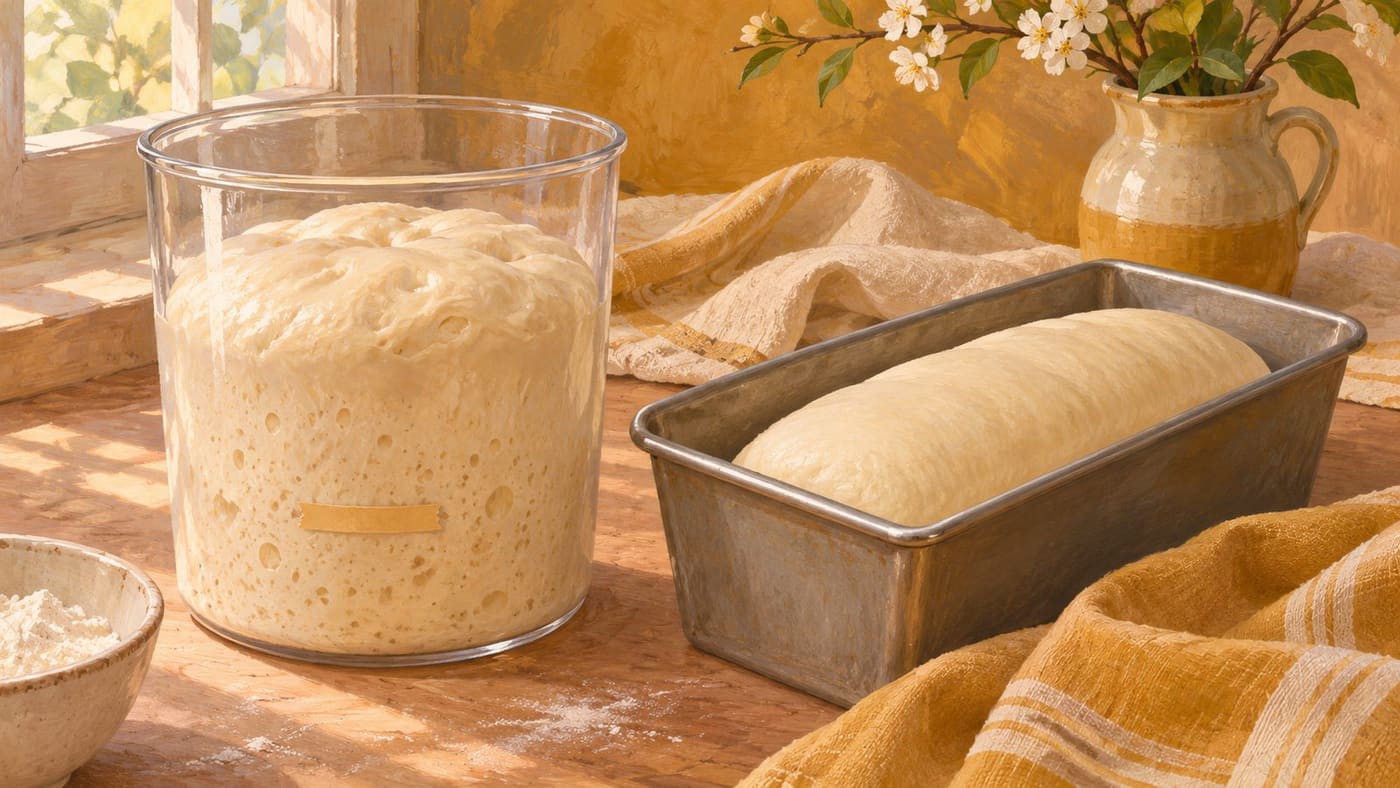
A transparent, straight-sided container makes a volume change easier to see when the recipe calls for it. Start with the dough settled in the bottom and note its level from the side. A removable mark on the outside can help. In a bowl that widens toward the top, a doubling of height need not be a doubling of volume. The point is to choose a reference you can read consistently, not to turn a kitchen bowl into a calibrated instrument.
Keep the dough covered as the recipe directs. A dry surface can feel different from the dough beneath, and it can make a touch test harder to interpret. When you look again, compare the whole mass with the first view. If it looks more rounded or you can see bubbles at the sides, note those changes alongside the volume. A photograph from the same height can help if the container is opaque or the shape makes the change hard to judge.
If you mark the container, don't assume the same mark will work for the next batch. Different batch sizes start at different levels. Put the mark at the level of the dough you have. For a shaped loaf, use a separate reference such as its height in the specified pan or how much it has filled out in the space around it. The change you want to see begins from the shape you actually made.
See what the first rise is preparing you to do
During the first rise, the dough is developing before you divide or shape it. Look for the change your recipe describes. When a recipe calls for roughly doubled dough, compare the present level with the initial level instead of comparing the dough with a picture taken in a differently shaped bowl. If it has barely moved, record whether the room and dough felt cooler than usual. Give it more time if that fits the recipe and its storage instructions.
Don't judge the first rise solely by how the outside feels. A smooth surface can conceal a dense interior, and a few bubbles at the edge do not show how much the mass has grown. If you are learning a recipe, note how the dough looks at the end of the stated time, then again when it meets the visual cue. These two observations give you a better starting point for the next bake than an isolated note that says it was slow.
When you move to shaping, follow the recipe's handling directions. The dough may lose some volume when you move or shape it. That does not erase the earlier observation. It gives the next stage a different starting shape. If you keep a record, write down which change you saw before shaping and which one you saw afterward. Otherwise it is easy to remember that the dough doubled without remembering when.
Use the final rise to judge the shaped loaf
Once the loaf is shaped, set it where it can rise under the conditions the recipe calls for. Compare its size and profile with what you saw immediately after shaping. A pan can give you a fixed reference. With a free-standing loaf, look at how it fills out and at the condition of the surface. A loaf that spreads sideways is changing shape, but the spread alone does not tell you whether it has reached the intended stage.
The King Arthur Baking explanation of dough rise discusses a finger indentation as a cue for the final rise. Where that method suits the dough, try a gentle press in a spot that won't disturb the shape. Notice how quickly the dough springs back and whether a shallow impression remains. A brisk return can suggest the loaf needs more time. Interpret the result with the recipe's visual cues and the type of dough. A sticky or unusually slack dough may make the test harder to read.
Avoid poking the loaf over and over in different places. A sequence of marks can tell you as much about how you touched the surface as about the loaf. If the first check is unclear and the recipe suggests waiting, set a short reminder and look at the whole loaf again. When the recipe gives a height cue or a different test, use that guidance. The goal is to make a practical choice about when to bake, not to produce a perfect indentation.
Compare two bakes before changing a recipe
Suppose a pan loaf looked ready later on Monday than it did on Saturday. Compare the notes. Did you use the same recipe and pan? Did you use a different batch size? Was the kitchen cooler, or did the dough start cooler? If you changed several conditions at once, you can list plausible explanations without selecting a winner. Keep a more consistent record next time.
Try changing one practical condition while keeping the rest familiar. If you usually judge the first rise in a wide mixing bowl, use a transparent container with straighter sides on the next bake. Keep the amount of dough and the recipe's other directions the same. You are testing whether the rise is easier to judge. An easier comparison can improve your timing even if the dough itself rises at much the same rate.
When comparing the baked loaves, give each one time to cool as the recipe directs. Look at the result in relation to the observations you recorded. A dense crumb can have more than one cause, including aspects of mixing, shaping and baking. If the loaf looks different from what you expected, do not use the finished crumb alone to decide exactly what went wrong. Pick a single earlier observation you can improve next time.
Check the setup when progress seems to stall
Start with what you can verify. Check when you began timing, what the starting level looked like and whether the dough was placed somewhere unusually cool. If the surface has dried, check the covering. Check that the ingredients and measurements match the recipe, including whether a step was missed. This takes less guesswork than moving the dough repeatedly between places without a record.
If you choose a warmer spot, follow the recipe or a method suited to the dough and check conditions before leaving it there. A warm location can help a cold kitchen schedule, but it can also accelerate a dough that was already moving. Keep the oven's preheating plan in mind if the loaf is resting in or near it. Check where the dough is before turning on an oven. Don't use heat as a substitute for finding out whether the dough has actually changed.
If the dough looks fragile or has lost its shape, consult the recipe's advice before reshaping. The appropriate response depends on the dough and how far it has gone. You can still take a useful note even if the bake is disappointing. Record what you saw before the loaf lost its shape, when you saw it and what you tried next. That gives you something more precise to change than a general instruction to proof less.
Plan the time between shaping and baking
Read the oven and pan instructions before you shape. Some recipes need a long preheat. Others use a baking vessel prepared in a particular way. If you first look up those steps after the loaf appears ready, you may have to wait for equipment when you wanted to bake. Choose a point during the final rise to check the equipment instructions and set a reminder. If the dough is resting in the oven, remove it before preheating.
On a day when you cannot stay near the kitchen, choose a recipe that explicitly fits the schedule. Some recipes include a refrigerated stage, but the point at which they call for it matters. A cold first rise and a refrigerated shaped loaf have different starting points when you take them out. Record which instruction you used and check what the recipe says about warming, handling and readiness afterward. Do not apply the previous day's room-temperature clock to dough you have just taken from the refrigerator.
If you have to interrupt a bake, note the last cue you saw and when you saw it. For example, a loaf may have risen halfway to its stated pan height when you paused. That is a more useful description than “nearly ready” because it tells you what you were comparing. When you return, check the loaf again before making a decision.
Keep a note that helps with the next loaf
You need only a few details: recipe, batch size, pan or container, start time, approximate kitchen conditions, what the dough looked like at each decision, and the finished result. Write down the cue you acted on. “Shaped at the first noticeable puffiness” is a different record from “shaped at the recipe's stated volume change.” If your observations don't agree, name the one you trusted and why.
A short note can also reveal what you never checked. If you recorded the room but not the starting level, make a mark on the next container. If you recorded the length of the final rise but not the pan size, add that detail next time. Keep the effort small enough that you can still bake. A record earns its place when it makes a future choice easier.
On the next loaf, use the clock to tell you when to return and the recipe to tell you what to look for. Compare the dough with its own starting point. Then decide whether to shape, bake or give it more time. That is a habit you can carry from one recipe to another, even when the signs of readiness change.
For another practical skill that starts with comparing what you can see and feel, read the guide to simple clothing repairs.
Sources and research note
Sources checked November 3, 2026. King Arthur Baking's bread guide and article on recognising a sufficient rise inform the discussion. The loaf examples and comparisons are conceptual. No recipe was tested for this article.